Skip to Content

Category Archives: Dies

Emboss Counters

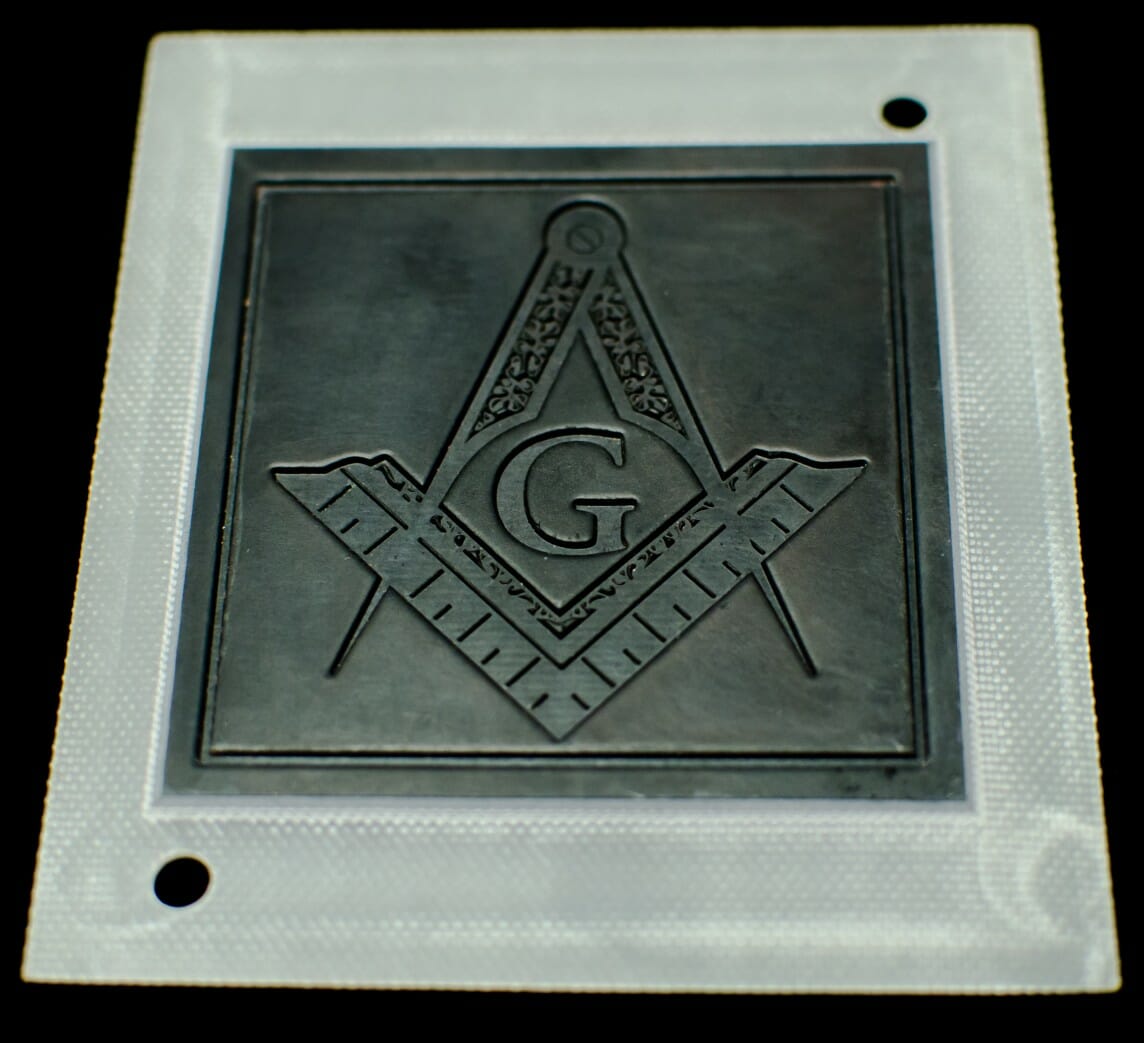
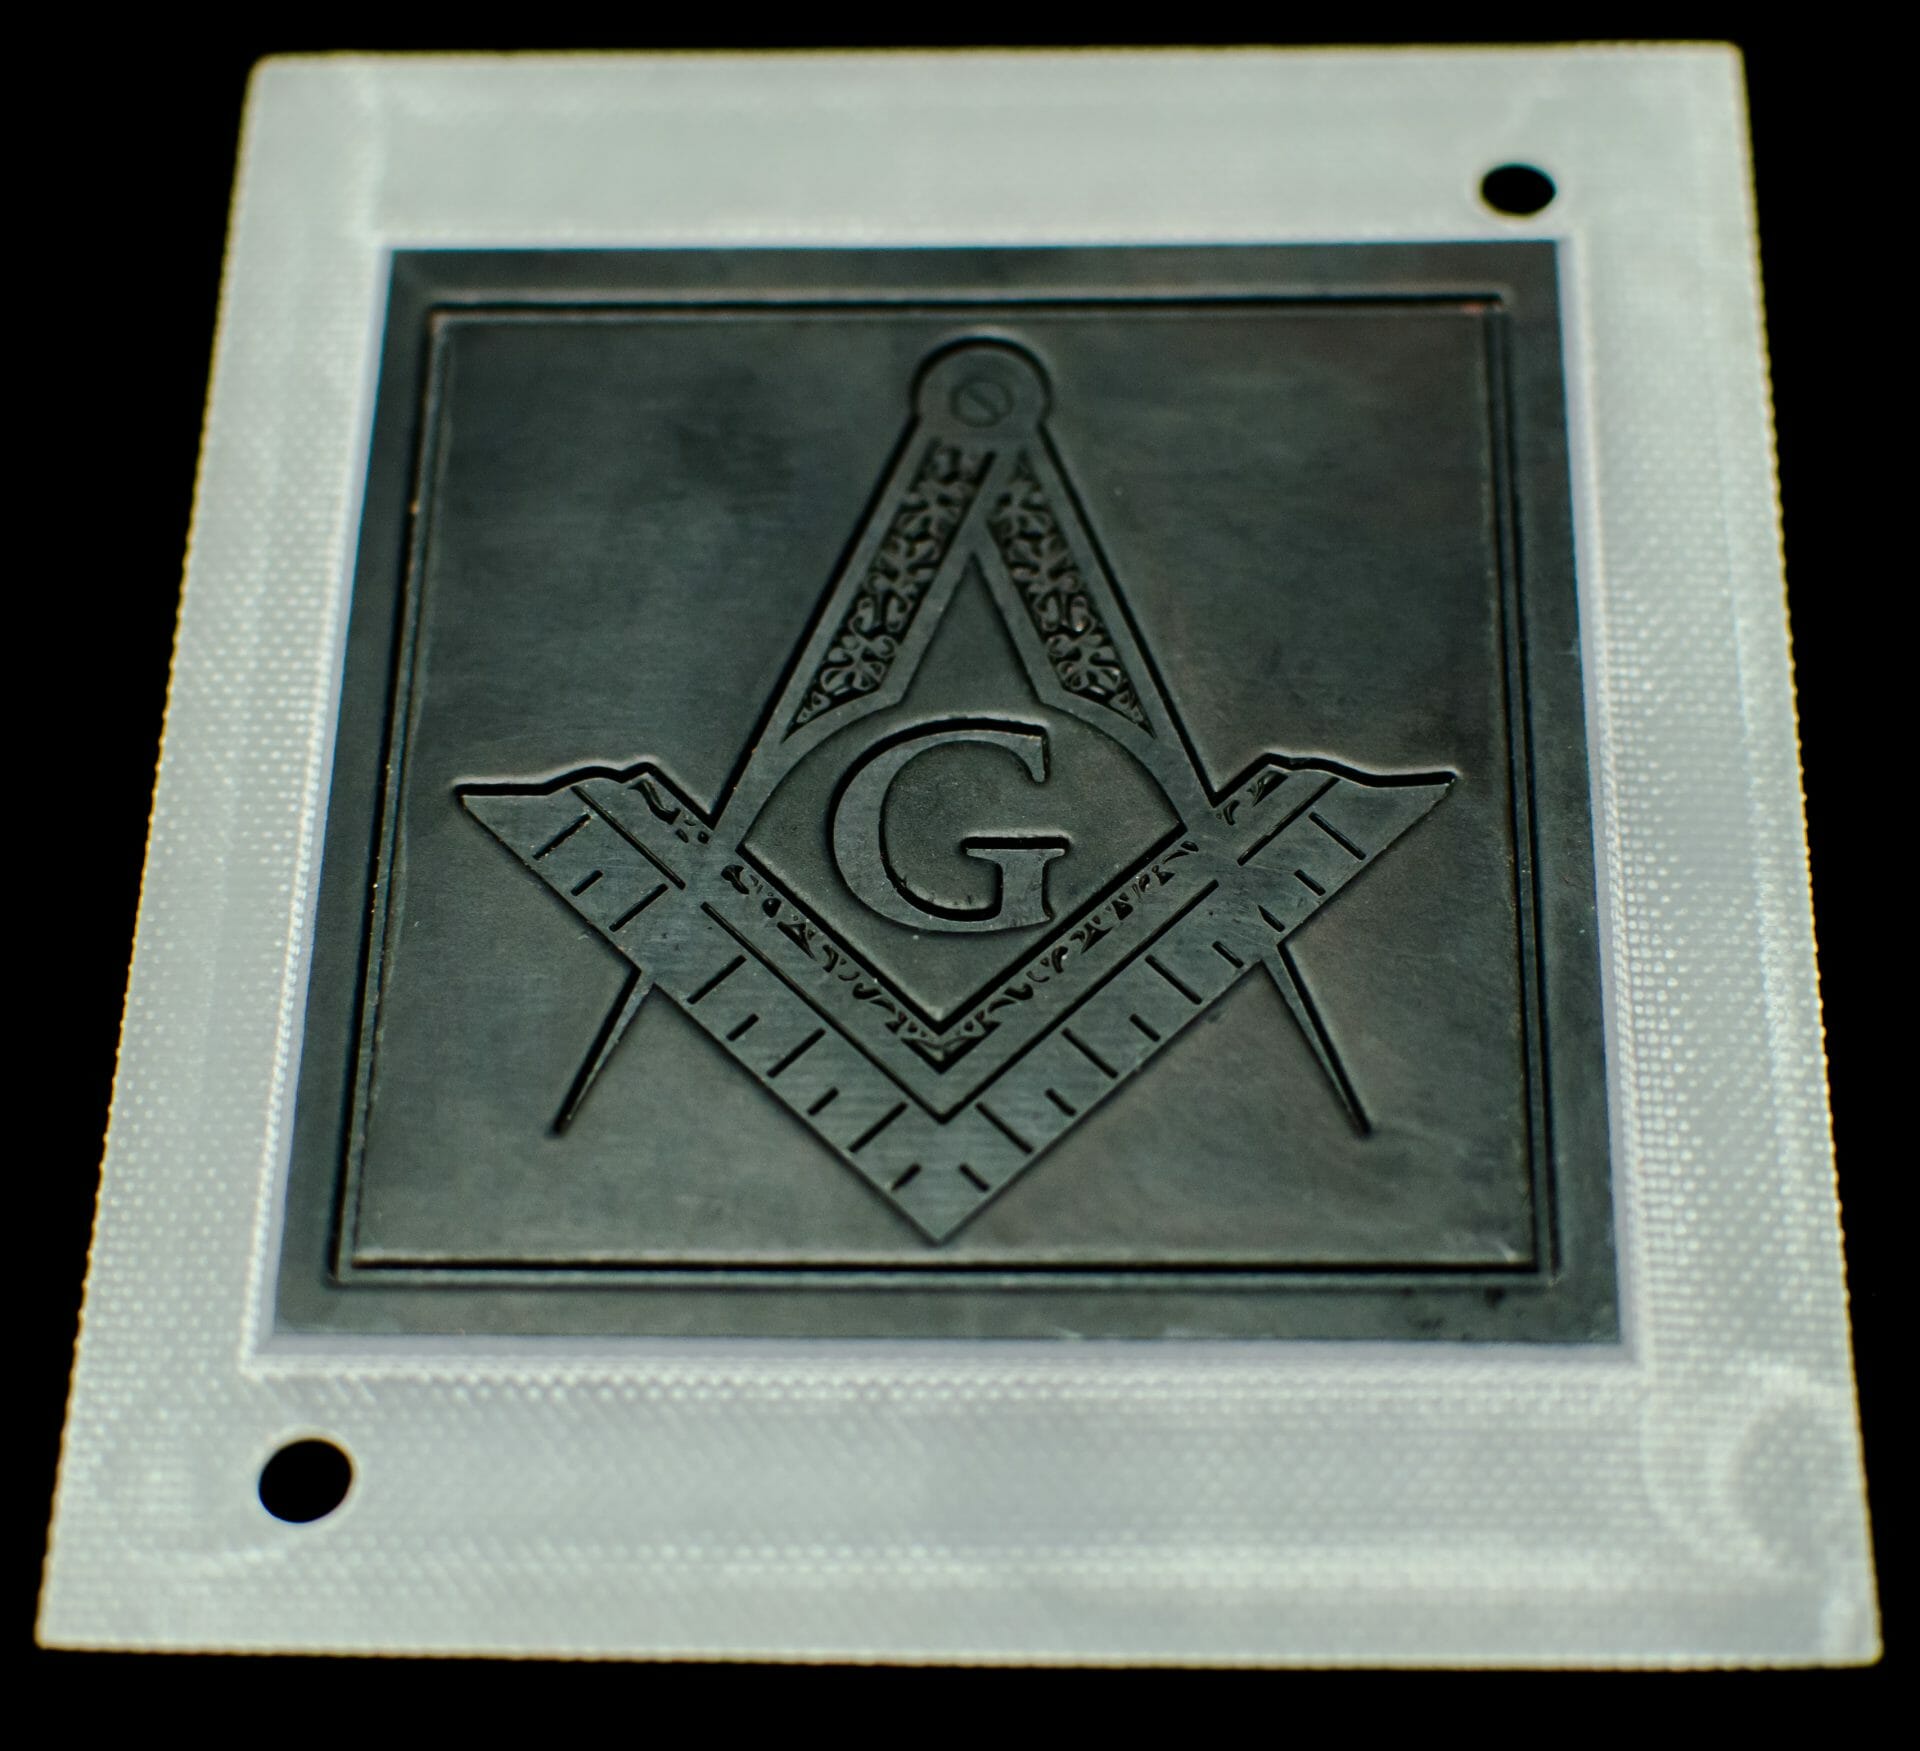
An emboss counter is the male portion of an emboss die. Emboss dies are etched or machined into the metal. We make counters for copper, magnesium, and brass dies. Once the emboss die is etched, we heat the die to 200 degrees to simulate the normal run temperatures while embossing. We use several different resins and hardeners that are poured into the female emboss die and topped with phenolic glass board. We use different thickness of the glass board, depending on the press. The calipers are .015’’ (Cylinder), .030’’(Heidelberg Windmill),and .060’’(Bobst & Kluge). A press then holds the three components with several tons of pressure until the resin is hardened. Once it is hardened, we machine very close to the image for paper relief. We drill the counter and die then add registration pins.

Many experienced craftsman pour their own counters on press. This is a similar process but it is more difficult because it is done inside a press. Those tight quarters make it more difficult to cut away material around the embossed image. Whichever way the counter is produced, it is mandatory to have a male counter.

Standard procedures for using phenolic counters is to cap the counter. Embossing without capping the counters will result in higher chances of die cutting and bruising of paper stock. This will also decrease the emboss depth. There are many materials for capping a counter including embossing film, tuff film and yellow board. The industry standard is yellow board. Yellow board is very inexpensive and very easy to use. Simply cut the board to the size of the die and tape to the counter once it is mounted to the press. Wet the yellow board with a sponge or spray bottle. Close the heated press to impression and hold for approx. 45 seconds. Once the press is opened the multi layered board will be molded around the counter. Trim off excess board with your Xacto knife and you are ready to run. The capped counter will eliminate die cutting and maximizes embossing depth.

We carry a full line of foil stamping and embossing supplies. If you have any questions about yellow board or any on press questions, we can help. We have very experienced pressman on staff available to assist you!

READ MORE

New Ejection Punches

New to the market-Tube punches with high tolerance brass plunger ejection. The plunger replaces rubber and springs for the same cost. The plunger seems to be much stiffer than springs. It appears it will be great for thicker stocks like chipboard or styrene. It may an  effective replacement for side out punches which may not work in tight areas. Stay tuned for updated info, once we get feedback on these new punches.


READ MORE

Printing Plates

Letterpress printing has made a tremendous comeback and the ease of photopolymer plates is a big part of this comeback. We manufacture copper, magnesium, photopolymer and wood printing plates. Photopolymers are by far the most popular.

The two most popular photopolymer products are KF-95 and KF-152. These are filmed based products that have a transparent and flexible base. The 95 represents .95mm or .037’’ in total thickness. The 152 is deep relief and represents 1.52 mm or .060’’ in total thickness. By subtracting these numbers from type high or .918’’ and the thickness of your type, you set the height of your base plate. .881’’ for KF-95 and .58’’ for KF-152.

A base plate for deep relief or KF-152 is a very versatile plate. It not only allows you to mount KF-152 but also any 16 gauge (.063’’) metal such as copper and magnesium. Copper is by far the premium choice for printing or foil stamping. It is due to the hardness of the metal. Because it is very hard, it can be etched with virtually no shoulders on the image. This allows for clean transfer of foil or ink with no plugging, or ink pink up on the bevels. Copper can also be hit very hard to give maximum debossing of the stock. Photopolymers must have a bevel because it is not as hard and small type and strokes will not hold up.

Cost is a major consideration in choosing plate material. The most common minimum plate charge is $30. You can get up to 48 sq inches of KF-95 or 45 sq inches of KF-152. Up to 30 square inches photopolymer or copper is the exact same cost, $30. If you have the base plate, the cost is the same and the material is superior why not choose copper.

READ MORE

Ejection rubber in tight areas

Here is a die we built earlier this week:

IMG_1666

Notice the different colors of rubber. It is important to use different durameters of rubber in a die. The red is a medium hard rubber that has been waterjet cut. It is appropriate for thinner stock up to 15 pts on high speed presses such as Bobst, Ijima, Brausse & DGM. The green rubber is called green gorilla and is a much harder rubber used in tighter areas to give more punch to eject material.

We also have began to use an innovative new rubber called Dura Strip. It is great for tight areas such as hanger pack knives or slots. When rubber is compressed, the material has to go somewhere. It usually expands outward. This causes a lot of stress on the steel knives. This stress can bust mitres or joints, blowout slots or just distort steel rule knives. Dura Strip does not expand when compressed so it makes it perfect for tight areas.

The right rubber can make your job easier on press. Rubber can keep your paper from hanging up and help to eliminate nasty nicks in your finished product. It can make kiss cutting easier with less cut through. It can also help your press to run at higher speeds. I have seen press speeds drop from 8,000 sheets per hour to 4,000 with the removal of only a few blocks of rubber.

Let us show you our expertise in dies and rubber can help your die cutting process.

READ MORE

Punches in steel rule dies

Tube punches come in many shapes and sizes. Circular punches are necessary when the diameter of a circle is less than one inch because it is not possible to bend steel rule. The smallest punch is 1/32”. Sizes vary up from there on 1/4” increments. Punches come in different bevels. Center bevel, inside bevel and outside bevel are the different profiles. Inside bevel punches are best for cutting thick stocks because they do not deform the substrate. They are also best for mitres when a cutting rule must butt up to the punch.

Punches eject in many different ways. The majority of punches eject with springs or silicone rubber. Side out punches are typically used on thicker materials and the slugs eject through the side of the punch and a routed trough in the die. Feed through punches allow the scrap to push through the punch. The smallest punch with a spring is 3/32”. Punches smaller than that would be side out. Many people think that the springs are to eject the slug from their material. Although this may happen, any form of ejection is solely to rid the punch of any scrap. If you must eject the chad from your paper, side out is your best choice. Be aware that your press may be lifted by the scrap holes. Amazingly only a small amount of paper pulled into the punch will blow the steel punch apart.

Custom punches come in many shapes, sizes and ejections. Custom punches are machined out of tool steel. Custom ovals, slots, and stars are examples. Metric punches may be custom if they have to be exact. Punches can sometimes be confusing. Please give us a call to make sure you get the right punch for your project.

READ MORE

The proper way to send in dielines

The proper way to send in a die line for a laser steel rule die.

We receive files in many different formats. The preferred format is an Illustrator EPS file. It must be a native file that was originally created in Illustrator. This means that it is a vector file, vectors are lines segments. TIFF, JPEG, Word and GIF files are examples of non-vector files. Many customers convert their files to PDF’s and that is fine as long as the original file is an illustrator file. We also receive emails with both Illustrator and PDF files. It is important to make sure both files are identical.Sometimes instructions are not included on one file and not the other or one file is not scaled to 100%. DXF files also work well. When these types of files are unavailable we can still work from samples, 100% scans and dimension drawings.

What is right reading?

We assume all files are sent right reading from our customers. If you do send your files die side, make sure to indicate this on the drawing and in your email.  There seems to be a lot of confusion about the term right reading. Here are a couple of different terms used:

Right Reading

1.) Print Side

2.) Outside View

3.) Sharps Down

4.) Print side/Front of print

vs.

Wrong Reading

1.) Die Side

2.) Inside View

3.) Sharps Up

4.) Back of Print

READ MORE

Scoring on a Cylinder Press

A lot of printers utilize equipment for die cutting on machines that were converted from letterpress printing presses. The most popular of these are Heidelberg but there are others such as Millers.  Recently we have seen more customers cutting on Vander Cook proofing presses. All of these presses are work horses and do a great job on die cutting registered work. One of the particularities of a cylinder is score heights. A cylinder press exerts different forces along the vertical and horizontal directions. Forces on scores that run parallel to the cylinder are less than scores that run perpendicular to the cylinder. We typically offset the score height by .005’’.

Score height is computed by taking the cut height (.918 virtually all letterpress equipment) and subtracting the caliper (in inches) of your paper. If you are using matrix you will need to subtract an additional .003’’ for plastic or fiberboard matrix and .009’’ for steel backed matrix

.918’’ cut height (type high)

-.010’’ paper caliper

-.003’’ plastic matrix

.905’’ crease Ht.  horizontal               .900’’ crease Ht.  vertical


We actually made a pocket folder die for an Accu-cut table press last week. We had to offset the vertical scores by 0.015’’ because the vertical scores were die-cutting the stock. You may have to experiment with your die maker to get the perfect combination on your press.

Using matrix or some sort of female channel is imperative for achieving a true letterpress crease. Crushing the paper without a channel will give you a folding line but your paper will definitely tend to crack. This may be fine on white stocks but probably not acceptable on colored or printed papers.

The unequal forces may also be a problem when cutting or kiss cutting a grid pattern. Many times operators may damage the horizontal knives by increasing pressure because the vertical knives are not cutting. It may be possible with a very long make ready but we usually suggest running it on a platen style press like a Kluge or Bobst. Another solution may be to run the vertical knives in one pass and the horizontal knives in another pass.


Give us a call with any of your die cutting challenges or visit us at our website, graphicdies.com 


READ MORE

Magnesium Emboss Dies

Could magnesium emboss dies actually be superior to copper emboss dies?

The answer is yes in many ways.

  • Much easier to control bevels during the etching process. Bevels help to stretch the paper fibers more gently. This allows for deeper embosses and less cracking
  • More cost effective-especially larger dies
  • We now pour cast counters on magnesium emboss dies
  •  Less concern over expansion
  •  Even though magnesium is softer than copper, there is less concern about crashing emboss dies than foil stamp dies.Less concern about expansion because of lower heat (also remember we can adjust artwork to accommodate expansion) 

Copper emboss is superior for:

  •  Registered embosses to either print or foil and particularly in large dies.
  •  Extremely long runs


Try out a magnesium emboss die and let us pour a counter for it. You may be surprised.At A&A Die we offer same day turns on copper, magnesium and photo polymer plates. We etch .250, .153, and .064 in copper and magnesium. Check us out and all of the services we offer at graphicdies.com

READ MORE

YOUR SHOPPING BAG